- Meta: John Kricfalusi Writes…
- Ripping (off) the Congressional video record
- Minibot Performs Surgery From the Inside Out
- Lost Cities
- Obscurity of the Day: Pauline, Percy and Little Priscilla
- Old Comics Bonus – “The Man Who Owned a Ghost!”
- Net Neutrality video – WOW!
- Gizmodo: Boycott RIAA in March
- Interactive copyright navigator to help cram for law…
- Cure writer’s block with writing toys
- DRM Causes Piracy
- Silly Little Dance
- OpenCongress — ripping open the doors to Congress…
- Strange Maps
- 69 – Not Kansas, But Just As Rectangular: The Land…
- F.G. Cooper
- BitTorrent Offers Legit Downloads
- Slices of sci-fi
- Who’s da Gorilla-man?
- Krazy Kat, Winkler Style
- “Far Arden” Chapter Five
- Ask Cross Puppet
- Video of biotech artist awaiting trial
- Free legal representation for fair-use filmmakers
Author Archives: STWALLSKULL
The I in the Triangle
Robert Anton Wilson’s Cosmic Meme-Orial (aka funeral) was on the 23rd of this month. He will be missed. Wilson has remained one of my favorite writers since I read The Illuminatus Trilogy almost 20 years ago… since then I read almost all of his books. He is simultaneously one of the funniest and most profound authors I’ve ever read… and he had more effect on how I view the world than any other author.
I was lucky enough to see his speak in Santa Cruz when I was briefly living there in 1990 or so… looking at the smattering of Wilson videos on YouTube, low and behold, there is the video from that very day. Watching through the 3 videos from the lecture I was amused to see myself in the audience at the end of the third video… it’s a weird thing to run into a video you’re in 17 years ago floating around on the internet.
I had actually recorded his lecture on audio tape when I was there, but the tape recorder had done a lousy job and it was unlistenable… I’m glad that someone else properly recorded it. It is some fun and fascinating listening. From what I’ve heard about the DaVinci code, fans of that will probably find this lecture of interest.
Here are some essays by him at the Maybe Logic Academy, an online school he started.
More Wilson essays here, along with articles by authors who influenced him.
Here are a bunch of interviews with him at the Maybe Logic Academy.
Here’s the site for the movie Maybe Logic, a good documentary on Wilson.
Hopefully they froze Bob’s head for future thawing… I want him back.
HOW TO GET YOUR COMICS ONLINE PART THREE: Getting your Images Ready For the Web
You see a lot of poor quality images on various comics sites (including some of the ones on this one!) Here are some things to think about when getting your art ready to present on the web.
BITMAP VERSUS VECTOR
A lot of people don’t know the difference between bitmap and vector image files.
Bitmap files contain color information about every single pixel in an image. Popular bitmap formats are .jpg, .gif, and .png. Adobe Photoshop is a program that primarily works with bitmap art (although they are combining it more with vector art in the newer versions). These images can be scaled downwards.
Vector files contain mathematical coordinates for the points and lines and other information that an image is made out of. The only really popular vector format I know of is .swf (shockwave flash). Adobe Illustrator is a program that works primarily in vector art. Vector art can be scaled upwards or downwards without losing quality.
A BRIEF OVERVIEW OF THE FORMATS
.bmp
These are bitmap files… they have all of the information about every pixel of your image uncompressed. These make good, high quality source files, but you will never want to publish them to the web, as they are large files, and will take too long to download.
.jpg
Probably the most widely used format is the .jpg (it is the format most digital cameras take pictures in). It is good for some things, but not for others. It is a lossy format, and most bitmap editing programs will ask you how high of quality you want to save it as when you save it.
Being a lossy format, the lower the setting you choose on this, the more information you lose… you sacrifice image quality for small image sizes. You lose information in an image even saving a jpg at 100 quality, so never use jpgs for your source files.
Why would you want a lower quality image? File size. If you want an image to download quickly, the .jpg does a nice job of compressing the information. At low settings, though, your images will look muddier and muddier.
The .jpg file tends to work well for gradiated color, photographic, and greyscale images.
.gif
.Gif files are also a lossy format, so again, never use these for your source files. However rather than controlling the range of quality from 1-100 to compress, with gif files you manipulate the color palette embedded in an image. The more you limit the number of colors used in a gif image, the smaller the file gets.
The .gif format works well for black and white and flat color images with a limited color range. Also, gif files can handle alpha transparencies, which jpg files can not.
You can have animated .gif files, but these are very limited. If these are not kept very brief they can get very large very fast.
.png
There are three major web compatible formats for presenting bitmap graphics, .gif, .jpg and .png. Of those, .png is rarely used.
Why is this? I believe mostly because the format was developed later than the other two formats. PNG’s actually use most of the advantages of both .jpgs and .gifs, and improve and expand on them vastly.
I think they are compatible with all browsers too.
That said, I almost never use them except for source files (they are a lossless format)… this is probably more a force of habit on my part than anything else. Since they are a lossless format, they don’t “approximate information” of the source for the sake of compression, as jpgs and gifs do.
You can read more about the advantages of png files here, if you’re interested.
Note that the .png format was adopted as the source file format for Adobe Fireworks, which is an excellent program for preparing bitmap images for the web. It also does a very nice job of integrating vector art, bitmap art and fonts… I’m not sure if it is a default of the file format to handle vector as well as bitmap art or not, but you can do so very well with Fireworks. However, Fireworks is not the robust image editing solution something like Photoshop is (and it isn’t intended to be), but a lot of web-related stuff it handles much better than Photoshop does.
.swf
The .swf is the format popularized by the Adobe Flash Player. Swf files can do a lot of things, including complex full animation and multimedia. It is the only popular vector format used on the web that I’m aware of, although there may be others. There is a little more involved in posting these files online than there is with the other formats. However, since it is vector, you can have totally clean artwork at any dimensions, usually at very small file sizes.
SCANNING
I’m not going to say too much about scanning or image editing in this post… you can read some good information about scanning, among other things, here:
RE: A Guide to Reproduction: A Primer on Xeorgraphy, Silkscreening
I generally scan stuff at 800 DPI as a black and white bitmap for my source copy of a black and white image (if I color, it is generally done on the computer). Save this initial scan as a source file, and make alterations to it as a different file… that way you can always go back to the source if you need to.
Before altering a black and white image in scale or dimension, you’ll want to switch it to greyscale, or you’ll get some ugly, chunky pixels you don’t want.
THINGS TO INCLUDE IN ALL OF YOUR IMAGES
Put copyright information, your name and your website url in all of your images (again, this is something I have neglected on my own website, although I’ve done it a lot in my Soapy the Chicken strip… I should always do this, though!). If you put a circle c © with a date and your name, you should be somewhat legally protected from copyright infringement. Obviously, you want copyright information on your website in general, but you should have it on each individual image you want to own the copyright of as well, because your images may not be viewed only on your website.
Anyone can grab your images for free on the web, and put the images on their website. While ideally they should at least give you credit for an image, frequently they won’t. If this makes you uncomfortable, you should very carefully in considering what you make available on the web. Having your copyright on all of your images will make it so anyone using the image will have to take the significant extra step of editing the image if they want to display your image without you getting copyright credit for it.
While I’m mentioning copyright, you may also want to consider offering some of your work under a creative commons license. These give you more flexibility in defining what can be done with your copyrighted images. The Cartoonist Conspiracy publishes all of the jam comics we produce online using a Attribution-NonCommercial-ShareAlike 2.5 license that allows people to reuse the content from them in certain situations. Read more about creative commons licenses on the creative commons site.
IMAGE SIZE
When deciding what size and dimensions to make your images for the web, consider the nature of the computer monitor. Some people still view the web on computers that only display 800×600 pixels. I tend to think anyone viewing the web at this size is pretty used to scrolling around to find the information they want. However, you may want to generally try to keep your web-posted images under 750 or so pixels wide anyhow to be accommodating… it will keep your file sizes down as well.
If you are making artwork specifically for the web, you may want to consider formatting it horizontally (like a comic strip) rather than vertically (like the traditional vertical comic book page). That way people will be more likely to be able to see the whole strip on their computer monitor at once.
That said, you do have an “infinite canvas,” if you want it… just keep in mind some users may not have patience for a lot of scrolling, if you care. I tend to think most people prefer the traditional & more passive “clicking to the next page” rather than “scrolling to the next part” (which can also take a lot longer to download, since you are loading more images on to a single page).
If you aren’t one of the majority of web users cursed with short attention spans, there have been some wonderful comics done exploring the infinite canvas concept, and it is definitely an area ripe for more exploration.
FILE SIZE
I mention above how some of the formats do a good job of compressing images down to a reasonable file size. File size of your images and all of your files online is an important consideration when you consider both how long it will take your users to download an image and how much of your bandwidth allowance you are going to use up.
That said, small files are somewhat less relevant than they used to be… more and more people have fast connections, and most cartoonists won’t dent their bandwidth allowance if they have a good hosting provider like Dreamhost (although really popular cartoonists might if they have heavily trafficked websites).
I believe having high quality images is more important than having small file sizes… although you don’t want enormous file sizes either. I wouldn’t generally go much below 80% on a jpg you’re publishing, and you probably won’t be happy with most .gif without at least 32 colors in your palette… the amounts on these things will vary with different images depending on how much information they contain, though. Try exporting versions of a graphic at different sizes and compare them… gradually you’ll get a feeling for the quality levels you want to shoot for.
If you’re posting a really large image, just save a small preview “thumbnail” version that links to your main image, or state the file size on the link that leads to the image.
NAMING YOUR FILES
Consider how you name your files carefully before uploading them. First of all, NEVER use uppercase characters, spaces or special characters… these will give you all sorts of headaches. If you feel like you need a space, use an underline _ instead.
I’d recommend trying to use a consistent naming structure for your files so they will be easy to find and know what they are… don’t be afraid of long names! Here’s an example of a good naming structure…
comics_funnycomics_ep01_p001.jpg
This structure breaks down four different components of an image in the name. Comics can be the main subject, funnycomics could be the name of a project, episode01 could indicate that it is the first episode of the comic, and p001 indicates the page number of the image.
Numbering with zeroes at the start of your numbering, as with 001, 002, 003 makes it so you have a consistent number of characters in your names up to page 999. I’ve found this useful in some situations where I know how many digits are going to be in the highest number page or item. It works for me, anyhow.
Use whatever structure works for you and makes sense for the image.
SOFTWARE
I use Adobe Photoshop, Adobe Illustrator, Adobe Fireworks and Adobe Flash for various image editing tasks. These all cost money, unfortunately, and cartoonists don’t generally work with a big budget.
Fortunately, you can probably find free software out there if you look for it. One well-known, widely used free image editing program is GIMP. I’ve never used it, but I’ve heard good things about it.
IMAGE HOSTING AND FTP
OK… you have your images ready to post. What now?
There are a huge number of free image hosting solutions, as I mentioned in the previous chapters of this article… Flickr is a well-known and flexible one, although they require you to have more “photographic” images than drawings or other art (don’t ask me why they have this brain-dead policy, I have no idea). Posting a question about this on the Cartoonist Conspiracy or Comics Journal message boards will probably get you a lot of advice. If you are going to use an image hosting site, MAKE SURE TO READ THEIR LEGALESE before posting anything to confirm that you will retain all rights to your artwork.
Ideally, you have your own web space somewhere you can upload (FTP) files to (FTP stands for “file transfer protocol”). If you have a modern version of windows, you can type the name of the ftp site (like ftp.yoursite.com) into the “address” box of any window and it should bring up a login for the ftp site for you to put your user name and password in. This is nice, because you can then treat the folders on your site pretty much like any other folders on your machine.
If this doesn’t work for you, there are a lot of free FTP programs out there. Filezilla is an excellent one.
Put all of the images on your site in a folder called images. You can add sub-folders with images by project or subject in your images folder as well (which I also recommend). Putting all images in your images folder will go a long way towards keeping your website files neat and orderly.
Previously:
HOW TO GET YOUR COMICS ONLINE PART ONE: Advantages and Disadvantages of Putting Your Comics Online
HOW TO GET YOUR COMICS ONLINE PART TWO: Publishing Options, and the Necessity of RSS Subscriptions
Next: Presenting Yourself Online
Cartoonist Parlour Games: Character Battling
Another Cartoonist Parlour Game I forgot to mention in my earlier post on the subject is Character Battling. In this, two or more cartoonists create characters, and then they take turns drawing comics with the characters. Usually fighting.
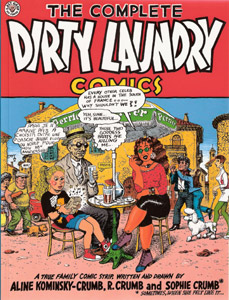
I don’t know what the history of this one would be… it is probably an instinctual activity of young cartoonists to collaborate with comics where each cartoonist draws their own character and they have them interact. In published comics, a notable example would be Robert and Aline Crumb’s ongoing semi-autobiographical Dirty Laundry Comics (previously to these, Bob Crumb had done a lot this activity with his brother Charles, as well).
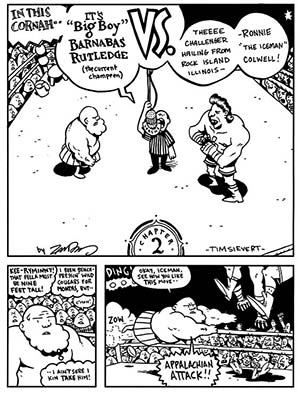
Recently, the cartooning innovators at Big Time Attic have been doing comics in this fashion where they are very battle focused. Their innovation in this case is to have the conclusion of the battle determined by a coin-flip, rock-paper-scissors, or some other semi-random determining game (they go as far as to videotape the determining event and put it on you-tube, so you can experience the tension first hand). Here is the most recent example.
Maria the Magic Weaver
How to Make Mini-Comics Box Sets
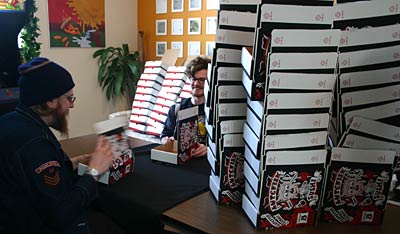
Above: Tim Sievert and Brett VonSchlosser work on collating mini-comics into Lutefisk Sushi Volume B boxes in a photo by Shad Petosky from the Big Time Attic blog.
In my post on Cartoonist Parlour Games yesterday, Tim Maloney commented that the collaborative mini-comics box set is another cartoonist parlour game (he recently was involved in making the The Bog Box Golden Treasury of Minicomics, which looks quite wonderful). I hadn’t been thinking about box sets in those terms previously, but it definitely makes sense.
We’ve had great success with mini-comic box sets in the Minneapolis cell of the Cartoonist Conspiracy, so I thought I’d talk a bit about how to organize your own box sets (maybe this will turn into notes for another volume of the Cartoonist Conspiracy Li’l Library eventually).
We’ve produced four box sets in Minneapolis. Two were collections of mini-comics by Minnesota cartoonists called Lutefisk Sushi Volume A (circa 2004, numbered edition of 100) and Volume B (circa 2006, numbered edition of 150). These were tied into some spectacular gallery shows of the same at Creative Electric Studios. We also used box sets to collect mini-comics from the last two 24 Hour Comic events we had in Minneapolis in 2005 and 2006 (in 2004 we collected 24 hour comics from our event as a book, which is a considerably more complex and expensive thing to pull off).
GREAT REASONS TO MAKE A MINI-COMICS BOX SET
- It is very economical. As opposed to printing an anthology, you only need to supply a box rather than paying for an entire print job. Contributors can print their own books to put in the box.
- Again, unlike a book anthology, a box can hold a wide variety of formats. In our boxes, we’ve had all kinds of sizes and shapes… one that was in a plastic bag with glitter, one that included a magnifying glass, and one that was a scroll hand-silkscreened in invisible ink. Obviously, you can’t do this with a book.
- The anthology format of most box sets makes it so people can try work by a wide variety of artists, which is a great way to turn people on to a lot of exciting work.
- It’s a fantastic way to collect the work of cartoonists from a 24 hour comic event… if event hosts organize a box set in conjunction with their event, they can really step the whole thing up a notch.
- If you’ve produced a lot of mini-comics on your own, packaging them as a box set can help you sell more of them to package a bunch of them together at a lower price than the cover price of the individual minis.
- They can be amazing for fund-raisers. With our two Lutefisk Sushi shows the Minneapolis Cartoonist Conspiracy made around $2000 that we sent to the Comic Book Legal Defense Fund. With Volume B the money we donated we gave in the form of memberships to the CBLDF for participants in the box set.
LIMITATIONS OF THE BOX SET ANTHOLOGY
The major limitation of the box set collection is that it would be very difficult to pull off without a pretty limited print run. These are all put together by hand, and it gets harder to pull off the more of them that you make. 100 seems to be the sweet spot, but we did 150 for the Lutefisk Sushi Volume B show. If people are contributing comics to your box set, you want to keep their print runs affordable too, and printing mini-comics can get expensive (and time consuming if they are elaborate mini-comics, of course). 100 copies won’t break most people’s banks.
Obviously, for the same reasons, you can’t really go back to press on one of these sets generally.
However, the limited print runs and hand-made factor also make these very collectible objects. Number them like you would with a limited edition print to emphasize the limited nature.
STEP ONE: FIND SOME COLLABORATORS
Unless you are planning a collection of your own work, you’ll want a lot of people to work with on this project. With box set anthologies, “the more the merrier” is definitely true. Additional collaborators add MUCH more to the value of the box than the negligible costs involved by including them.
Besides your cartoonist friends, the internet is definitely the best way to find cartoonists to participate. I like to think that The International Cartoonist Conspiracy website is the best place to look.
The Cartoonist Conspiracy is open to all cartoonists, and includes professional and amateur cartoonists in its ranks… anyone with any interest in making comics can join. Additionally, anyone can start a cell in their community… contact me if you want to start one and I’ll get you set up (I’m the Cartoonist Conspiracy webmaster). You can organize your group utilizing our message board.
We currently have cells in Minneapolis MN, San Francisco CA, Calgary/Edmonton, Chicago IL, Lancaster PA, Milwaukee WI, Montreal, Rice MN, Sacramento CA, Sioux Falls SD, Springfield IL, Kansas City MO, Santa Fe/Albuquerque NM, and North Carolina.
If you don’t want to go through us, there are plenty of other places to find collaborators as well… posting on the Comics Journal message board will also probably get you some good results.
STEP TWO: DEFINE YOUR GOALS
Do you want your box set to have a theme? While I would advise against making a theme that is too narrow, like “Comics About French Poodles” or something, because you will have less people contribute than if you have a broad theme. The theme of “mini-comics by cartoonists living in Minnesota” worked very well for our Lutefisk Sushi anthologies (we had over 30 cartoonists participating in volume A and had 50 cartoonists participating in volume B). If you let people use mini-comics that they have already produced in the box, you will probably get more submissions… although it is always good to encourage new work! Some other questions to consider:
- Do you want to organize it around a gallery show?
- How many copies do you want to make?
- How are you going to put the boxes together and print them?
- How will you promote and distribute them?
- How many copies will collaborators get?
- How many boxes do you want to make?
- If you make a profit, what will you do with the money? You may want to consider organizing this for a charity.
You’ll want to discuss these and other logistics with your collaborators before getting started.
STEP THREE: ANNOUNCE A DEADLINE AND GET PEOPLE STARTED
Put the word out about what you are looking for and when you want it by. Things to note:
- If you have a theme, let people know it.
- Are there any format guidelines or restrictions they should know about.
- Do you want people to sign their mini-comics?
- Give people a size limit… so far we’ve used boxes that will fit comics up to 5.5″x8″, but you may want to go for a smaller or bigger box.
- How many copies do they need to contribute?
- How many copies of the box set will they get for participating?
- Will you want their help with collating, printing, or anything else? You should! Let them know.
- Make a hard deadline date. I recommend making this date earlier than you actually need it. That way, when people email you enmasse the day of the deadline asking for more time, as they inevitably will, you can afford to give them an extension to secondary deadline.
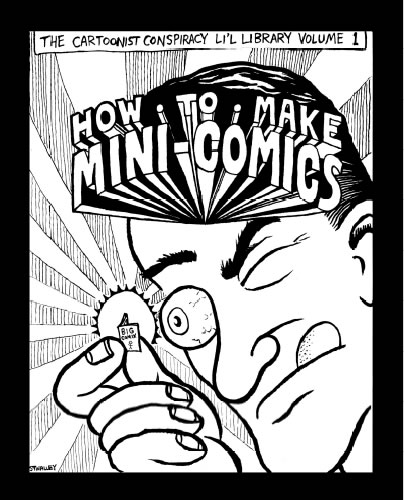
- If you recruit people who have never before made a comic in their life (which I also recommend pursuing… every artist should try their hands at a mini-comic), refer them to this online “How To Make Mini-Comics” mini-comic.
STEP FOUR: ORDER THE BOXES
There are probably any number of places online to get boxes. We’ve used this site… note that they have some sweet spots in some of their pricing on certain types of boxes and quantities that you may want to look for if you use them.
Other than for the first Sushi show, we used this box. Here are a couple other good, inexpensive ones.
STEP FIVE: PRINT THE BOXES
We’ve used two methods for covering the boxes. For the Lutefisk Sushi shows we silkscreened wraparound covers, for the 24 hour boxes we printed stickers that we adhered on the covers. You could do a number of other things as well. A printed band around the box could look really cool, you could draw the covers by hand with crayon, you could use a rubber stamp… if you have a gocco machine, that would work great (unfortunately these wonderful devices are no longer being manufactured, although you can still find some supplies for them at Wet Paint Art). The sky is the limit.
You can see a video of Lutefisk Sushi Volume B boxes being hand silkscreened by Lonny Unitus and Shad Petosky here.
STEP SIX: COLLATE THE BOXES
You’ll want to get a bunch of your collaborators to help with this. It will probably go something like this:
- Number all the boxes.
- Fold all the boxes into box form.
- Put all of your mini-comics in stacks by comic around a big table or two.
- Have people grab a box, and walk around the tables putting one of each comic into the box, one comic at a time. Take it slow, you REALLY don’t want to have to do this twice.
- When all the comics are in a box, close the box and add it to the box pile.
STEP SEVEN: DISTRIBUTE THE BOXES
Every participant should get at least one box, depending on the number of participants and the print run.
Beyond that, the best way to sell them, in my view, is in conjunction with a gallery show featuring work from the box on walls. Putting together a comics gallery show is a whole separate beast that I’ll probably post another how-to about sooner or later.
The other major ways to sell them would be to take them to your local comic shops and comic conventions. You can also offer them for sale to some of the fine mini-comics distributors that can be found around the web. Here are some of them:
STEP 8: BURN THE BOXES
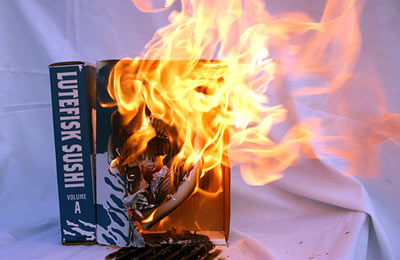
Just kidding about that one…
Besides the coolness of the finished mini-comics box, this project is a really great way to get to know cartoonists in your area and build relationships for fruitful collaborations. Good luck!
Have you ever made a mini-comics box? Are you planning to make one? Let us hear about your experiences in the comments!
Recent Interesting Links: February 23, 2007
- Electroshock therapy for China’s “Internet addicts”
- Photos of people wearing fezzes
- Chimps use spears to hunt for vertebrates
- T.S. Sullivant
- Jimmy Swinnerton
- F.G. Cooper
- Virgil Partch “VIP” Paperback Covers
- Redesign of gluyaswilliams.com
- Gluyaswilliams.com – New Stuff
- From Filboid Studge: Gluyas Williams at Life
- Your Favorite Cartoonist
- Super Duck Comic
- The Unresolved Questions Dept.
- Dr. Mickey Mouse and the Sulfa Drugs
- Obscurity of the Day: Gahan Wilson Sunday Comics
- The Clown Killers Of Colombia
- OpenSecrets.org Launches Section to Follow the Race…
- Martin Scorsese to go fantasy/sci-fi with THE INVENTION…
- 101 Projects for Artists and Illustrators
- SETI Finally Finds Something
- Cat with 26 toes
- See Chris Ware, hear Chris Ware, but no touching…
- Four best ways to sit at your computer
- Mickey Styled
- 101 ways to beat drawer’s block
- NBM to Publish Early Mutt and Jeff
- 23 Snapshots from the RobertAntonWilsonFest 2/18/07
- Garrity on The Byrne Board
- Obscurity of the Day: Cinderella Peggy
- Not ape’s foot but bear’s paw in dump
THE CARTOON CRYPT: I Ain’t Got Nobody (1932) : Sing Along With The Mills Brothers
I’m a big fan of Fleischer Studios cartoons and of Mills Brothers music… here are the two together.
The Mills Brothers were somewhat of a novelty act, since the only instrument they used in the 30’s was a guitar… the rest of the “instruments” were produced by their voices. The music would be just as enjoyable without knowing this, though.
If you dig the music of the Mills Brothers, check out this well-made and inexpensive collection of their best recordings from JSP Records. You may wanna check out the rest of the stuff in the JSP Records catalog too… as well as Proper Records. Those two publishers are putting an amazing quantity of wonderful old music into well-researched, inexpensive cd box set collections.
How to Make Mini-Comics: The Mini-Comic
I recently created a How to Make Mini-Comics Mini-Comic with my collaborators in the Minneapolis cell of The International Cartoonist Conspiracy. It is intended to serve as a downloadable textbook for those seeking to learn how to make a mini-comic. You can read more about it, and download the comic, by clicking the image below.
Cartoonist Parlour Games
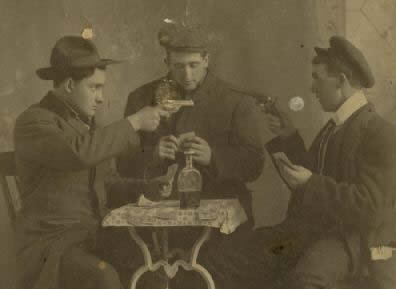
In recent years the number of Cartoonist Parlour Games (i.e. drawing projects & challenges with guidelines) has been exploding. And I’m not even counting Pictionary.
I thought I’d provide an overview of the ones I’ve heard of or participated in (I’m the webmaster and one of the founding members of The International Cartoonist Conspiracy). Some of these games, particularly the extended jam and the 24 hour comic I feel I’ve learned a whole lot from as a cartoonist… I highly recommend trying some of these games out if you have any desire at all to draw comics. It will make you a better cartoonist.
Jam Comics
Started in the late 60’s by the Zap cartoonists. One cartoonist draws a panel or space on a page, another cartoonist continues, and then another until it’s done. Note that you can see a lot more examples of jams and many of the other parlour games (many very NSFW) here. Conspirator Zander Cannon of Big Time Attic recently wrote an excellent summary of how to have a successful comics jam here, and there is good general summary of comic jamming by The Monthly Montreal Comix Jam here.
Here is a jam comic example from the Minneapolis cell of the Cartoonist Conspiracy.
Extended Jam Comics
A variation of the traditional jam comic that we’ve been pioneering in the Minneapolis Cell of the Cartoonist Conspiracy. Rather than doing one page of randomness, we usually do 16 in an evening (a nice convenient number for reprinting as a mini-comic). We number all the pages at the outset. Everyone takes a random page. When you get to the end of a page, you look at the first panel of the next page and try to thematically tie your panel into the previous panel and the next panel. To help make things slightly cohesive, we choose 2 or 3 themes at the outset… for a while we were picking from a bag full of suggested themes, but lately we’ve just been choosing themes from a random page of a magazine or just having people suggest what they want to draw. One other thing we have tried (which I want to try more) is having a character or two designed at the outset that can run through the comic (some structure to jam comics seems to make them a lot more fun to read later). Zander Cannon also discusses how to make a successful extended jam in his previously mentioned post.
Here’s an extended jam example from the Minneapolis cell of the Cartoonist Conspiracy.
Endless Jam Comics
This was created by the Iowa City Phooey cartoonist collective in the 1980’s, which I went to some meetings of when I was a kid. They had a roll of paper like register tape attached to a wooden device where you would draw a panel and then roll it forward for the next cartoonist to continue. At the end you could just attach another strip, if you were inclined. I don’t have an example of this one, unfortunately.
The Narrative Corpse
The Narrative Corpse is another variation on the jam comic. This one was popularized by Art Spiegelman, who did a widely distributed narrative corpse with 69 other artists. The concept is based on the “exquisite corpse” game of the surrealists. A cartoonist draws a panel based only on knowledge of what occurred in the previous panel… and then passes their panel on to the next cartoonist.
I have no examples of this, but there was one recently organized by Aeron Alfrey on this site, which I believe is going to be published sometime soon.
Jam War
Jam War is a project pioneered by Nat Gertler (who also founded 24 Hour Comics Day). It was a collaborative comics competition where groups of creators were given a theme, and 12 hours to draw 8 pages. Basically, this is not different than a conventional comics jam, except it is competitive… the resulting work is judged for which one is best, so there is a winner.
The Minneapolis and Rice, MN Cartoonist Conspiracy cells participated in this, but the results have thus far only been published as a minicomic called “Mission Accomplished” which is not online, so I have no example of a Jam War to share, unfortunately.
The Comic Blitz Tournament
This one was introduced to our cell by conspirator Andrey Feldysteyn, and he wrote up a summary of it here. He had done it previously with his cartoonist friends in Russia, where he hails from. Someone chooses a random topic, and the participating cartoonists draw as many gag cartoons on that topic as they can in 10 minutes. At the end of the 10 minutes, the cartoonists pass the cartoons around for voting… judges (which can include participants) mark on the back of the drawings. They write nothing if they don’t think it works, 1 cross if they like it, 2 crosses if they love it. The cartoonist with the most points wins. Gambling and drinking should be involved.
24 Hour Comics
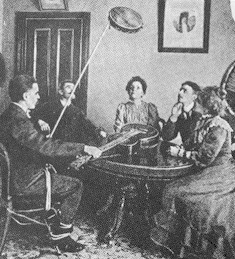
Each cartoonist draws 24 pages in 24 hours… extreme sports for cartoonists. This wonderful exercise was conceived by Scott McCloud (author of Understanding Comics and Making Comics among other things). You can find the rules aka The Dare here. Nat Gertler took the challenge and made it into a national holiday for cartoonists… 24 Hour Comics Day. As far as I know Nat hasn’t announced the date for this year’s 24 Hour Comics Day, but you can subscribe to the 24 Hour Comics Day blog to stay posted on it.
Here is an example of a 24 hour comic I made.
288 hour comics and Gross Comics
This is a new project being pioneered by the Cartoonist Conspiracy. These are both variations on McCloud’s 24 Hour Comic. In the 288 hour comic, you draw 24 pages in 24 hours once every month for a year, and end up with a 288 page graphic novel at the end of the year. In a Gross comic, you draw 12 pages in 12 hours once every month for a year, and end up with a 144 page graphic novel at the end of the year (144 makes a gross… corny, I know, but catchy!).
Beyond that, though, the goals of these projects are completely different. These are intended as motivational tools for producing good comics, rather than just an exercise in making comics quickly (as with the 24 hour comic). To that end, “cheating” is encouraged. You may work ALL YOU WANT on any part of the project outside of the defined time… however, at the end of the defined 12 or 24 hours every month you should have your 12 or 24 pages done, or you should work like heck to get them finished up as quickly as possible after that. If you reach the next month and have not finished your pages from the previous month, you have failed. We started the Gross Comics Project last weekend, and we’re looking for hearty cartoonists from around the globe to join us in this project… we’ll post links to all participants on the cartoonist conspiracy blog.
You can see examples of Gross Projects in progress here.
5-Card Nancy
Another Scott McCloud invention. Cut out some Ernie Bushmiller Nancy comic strip panels to make a deck of cards, and then get a group of people together to play. Deal out the panels and take turns placing them next to each other to continue the story. Read the rules here to learn how to play here.
You can play a solitaire version of 5-Card Nancy online here.
9-Panel Shuffle
This is a game I invented where you create nine panels that can be randomly shuffled and read in any order for different effects. It was originally intended to be viewed in an open source flash movie that I built, although you could just do it on cards and rearrange them by hand… you can see it in action here. Clicking the shuffle button rearranges the panels. You can download the source here if you want to make a online version. Please let me know if you do so I can link to it.
Shuffleupagus
We haven’t tried this one in Minneapolis but our comrades in the San Francisco cell of the Cartoonist Conspiracy really enjoyed it. Shuffleupagus is a jam technique invented by Jesse Reklaw. It involves having participating artists draw a character and a setting on blank index cards… and, well, the rules are a little convoluted to explain after that (although they look like fun)… read more about it here.
22 Panels That Always Work Project
I just heard about this the other day, and I think I’ll probably give it a try at some point soon. The 22 Panels That Always Work Project is pretty simple… just look at the famous Wally Wood 22 Panels That Always Work comic, and draw your own version of it. After that you may want to draw your own version of Ivan Brunetti’s 22 Panels That Always Work too!
I’m going to start introducing a new cartoonist parlour game every month or so on this blog, so check back to participate and/or enjoy the results!
Have you heard about other Cartoonist Parlour Games? If so, please let us hear about them in the comments!


